Zinc U Channel Border
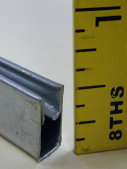
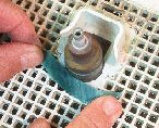
Example of Zinc U Channel
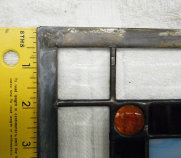
Example of Finished Molding
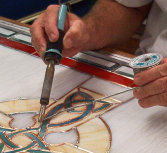
Soldering the glass
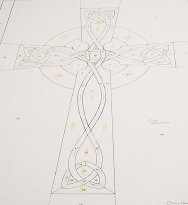
Stained Glass Pattern
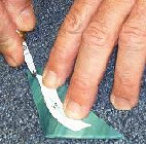
Copper Foiling
Grinding Glass
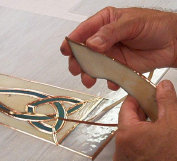
Cutting Glass
Finished Work - Celtic Cross
Antiquing the glass
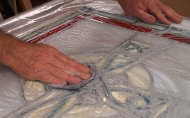
Cleaning the glass
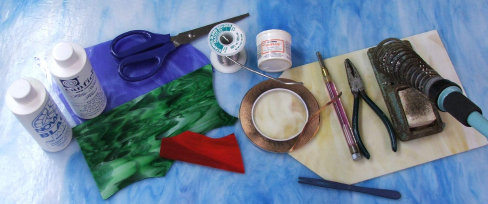
Stained glass construction tools
For permanent installation in an exterior opening, the stained glass window should be mounted inside of a clear exterior window. Standard double strength window glass will work, but tempered or safety glass may be a smart choice for the exterior glass. This will not only protect the work from weather but also from baseballs, golf balls, etc.
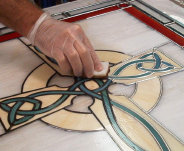
the bright lines so they don't detract from the work. I use a commercially made black patina which chemically turns the bright solder a dark gray to black This way the solder lines blend in better and give the glass a more antique look. Other patinas are available that allow bright solder to be changed to a green, or bright copper finish. After antiquing all of the solder, washing and drying the panel again, I like to wax the solder lines with a liquid wax especially made for stained glass. This promotes an even color to the lines and prevents oxidation. The final color of the solder after waxing turns out to be a satin gun metal color sometimes with slight dark copper highlights
smoothes the solder lines and the dishwashing liquid washes away the flux used in soldering. After rinsing, a second washing with #0000 fine steel wool and dishwashing liquid further smoothes and polishes the solder lines. After drying, the work is ready for antiquing. During this cleaning process the work can be thoroughly inspected for any flaws, bubbles, etc., that might affect the look of the finished work.
all the pieces become one unit. In lead came construction, solder is used to join the lead strips together. Popular solders are 50/50 (50% tin, 50% lead), 60/40 (60% tin, 40% lead) and 63/37 (63% tin, 37% lead). In recent years, a number of glass artisans have started using lead-free solder even though it is more expensive and many feel more difficult to work with. The bulk of stained glass work is still built using tin/lead solder. I use 60/40 solder and a Weller 100 watt temperature controlled soldering iron in my work. When solder is melted, it flows down between the pieces and seals the joint. A skilled craftsman can then flow more solder along each seam and build a rounded, continuous bead of solder on one entire side of a panel. When finished, the panel is turned over and the same rounded, continuous solder bead is created on that side. On my window panels, I add a 3/8” or 1/2” zinc border strip as an edging to add sturdiness and make the panel easier to handle (see example below). On smaller works, this edging can be the finished frame.
by the famous Tiffany Studios. Each piece of glass is individually wrapped with an adhesive backed copper foil strip (sold in rolls). Copper foil is most commonly used in 3/16”, 7/32” and 1/4" sizes and most art glass is about 1/8” thick. Since the foil is wrapped around the edge of the glass, a smaller foil size usually results in narrower lines in the finished project. I like using 7/32” foil and 3/16” for very small features. As each piece of glass is wrapped with foil and placed back on the layout copy, further adjustments may be needed to fit the pattern. After wrapping all the pieces, I move them to my light box to make sure that colors work well together and that there are no flaws or hidden problems. At this point, the entire project can be viewed as if it were a finished work in a window. Once final adjustments are made, it’s back to the layout table and time to solder the pieces together.
Full size patterns are available from a number of sources and hundreds of good stained glass pattern books are readily available. Searching sites on the Internet is another great way to come up with design ideas. Rarely have I found a design that is the exact size that I want to build. Thanks to copiers that enlarge and reduce and graphic drawing and re-sizing computer programs, it is easier than ever to create a stained glass design. Few glass artists simply “freehand” a new design from scratch. Most of us start with a size and a central concept, borrow an idea from here or there, draw, adapt and redraw until we have a finished product. Often lines are added or moved to compensate for cuts that cannot be made in glass or to make the project more aesthetically pleasing.
as pattern pieces to cut each piece of glass. Another copy I use to lay out the glass after cutting. When cutting the pattern pieces, I use special 3 bladed scissors that remove about a 1/32” sliver of paper between the pattern pieces. The extra paper removed compensates for the thickness of the copper foil that will wrap each piece of glass. Scissors that cut out a larger width of paper are used in the lead came construction method. I have also found it useful to color my pattern pieces and draw lines on each piece denoting the “grain” of the glass so that color striations or patterns in the glass “flow” in the same direction. When all pattern pieces are cut and laid out on the layout copy, it's time to cut glass.
carbide tipped oil reservoir cutter and a table covered with indoor/outdoor carpet. It may seem primitive, but it works for me! I tend to cut by color…..cutting all pieces of a particular color at the same time, grinding all those pieces to fit, and placing the cut glass onto the layout copy. Each piece of glass in a stained glass project is individually cut and ground with a diamond bit glass grinder to match the pattern piece. This is the most critical and time consuming part of any glass project.... but I'm a bit of a perfectionist. In recent years, disc grinders have become available that will allow better grinding of flat surfaces. Also, many glass artists use a special diamond blade band saw (very similar to a wood cutting band saw) to make cuts in glass that are virtually impossible by hand. The glass band saw allows more complicated pieces of glass to be cut, thereby reducing the amount of pieces and number of lines in a finished piece.
If you cut and grind each piece of glass carefully to match each pattern piece, your finished project will go together with even lines and minimal adjustment. After all pieces have been cut, ground and laid out, even the best craftsman will have to make some adjustments to fit. When all the pieces fit well, it’s time to foil.
The Stained Glass Construction Process
The following construction techniques may be more detailed than necessary to give a basic understanding of the process of building stained glass. Hopefully, the extra detail may provide some “tips & tricks” for other stained glass artists or just extra detail for those who like lots of information. I have learned much from others!
The Pattern:
It’s wonderful, but rare, when a customer has an exact idea of what they want. Usually the customer has a concept only, and, with guidance, the glass artist can translate that into a workable finished pattern. When I complete the drawing of a full sized pattern, I lightly color it with colored pencil and number each piece. For years I traced 2 additional copies with carbon paper but now, with the advent of large format plain paper copiers, for a few dollars each at my local copy shop, I can have 2 full size exact copies in minutes.
Cutting the Pattern Pieces:
Cutting Glass
Grinding Glass
Copper Foiling
Foiling the Glass:
Soldering the Finished Work:
Cleaning the Finished Work:
Cleaning the glass
Soldering the glass
Antiquing the Finished Work:
Framing, Hanging or Mounting the Finished Work:
Antiquing the glass
Finished Work - Celtic Cross
I hope that this rather detailed explanation has provided answers, prompted questions or provided food for thought. If I can answer specific questions about stained glass construction ...or help you design a stained glass project for your home, please contact me.
Cutting the Glass...Grinding to Fit:
DEAN'S STAINED GLASS
Stained Glass Pattern
DEAN'S STAINED GLASS
Deciding on or designing a pattern is the challenging part of a stained glass project.
The term “stained glass” derives from centuries ago when artisans painted a mineral based paint on glass and fired the glass, thereby fusing
Choosing Your Glass:
the color into the glass. Modern stained glass church windows still use this method to achieve the beautiful detail of human faces and figures. Whether machine made or hand blown, modern glass is still made by adding minerals, particularly metals or metallic compounds, to molten glass. Cathedral glass is clear, colored glass available in thousands of patterns and colors. Opalescent glass is a milky glass varying from translucent to opaque and is also available in thousands of color variations. The Tiffany Studios in the late 1800’s popularized opalescent glass in their magnificent lamps and windows. In recent years, mass production techniques have made clear beveled glass doors and entryways more popular and affordable. Bevels are beautiful in areas with direct sunlight……the sparkle and rainbow effect of bevels is wonderful. However, almost infinite color possibilities are possible when sunlight shines through a multicolored opalescent glass window. I like to build a cathedral or opalescent glass design framed in a border of clear bevels……the warmth of a color design and the sparkle of bevels in the sun.
I hang my colored original drawing on my shop wall as a guide. I cut one copy into pieces to use
There are a lot of good glass cutters and cutting surfaces out there. I simply use a Toyo
Many accomplished glass artists use lead came construction, but I prefer the copper foil method as pioneered
Solder is an alloy of tin and lead that, when melted, joins the copper foil on each piece so that
I use #3 coarse steel wool and dishwashing liquid to begin the cleaning process. The steel wool
Some artists leave solder lines their original bright silver finish. I prefer toning down
Small window panels can have hooks soldered to the
Comments? Questions?
E-Mail Dean
When choosing glass for your stained glass design, you have more color choices today than ever before. Any good stained glass artist or studio can suggest colors and provide glass samples to aid in making that decision. Your color choices are extremely important to your satisfaction with the finished work.
zinc border and then hung with chain in an opening. Framing your stained glass creation in a sturdy wood frame and hanging it in front of a window has many advantages. The work is protected from breakage by the stability of the wood frame and the protection of the outside window. Should you move, your window can move with you. A wood frame can be finished to any taste, transported easily and moved readily to a different window. A nicely finished wood frame can compliment the beauty of your unique stained glass window.
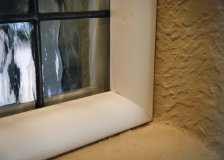
To install stained glass in an existing opening with a protective glass, most people install a wood or plastic stop or molding around the opening. The stained glass window can then be set into the window, against the stop, and then additional decorative molding can be set in place to hold the stained glass in place. Many people use quarter round or something similar as this outside molding. Many building supply stores sell this type of molding in vinyl or vinyl covered finishes so the molding doesn't have to be painted. Installing your glass with an outside protective glass does create a "dead space" between the glass. This could create condensation in temperature extremes, or make a great home for you favorite spider's web. Consequently, you may want to install the inside molding so that it can be removed fairly easily. In this way, the void between the glass can be cleaned should it become necessary. Also......If you move, why not remove your stained glass and take it with you!
Example of 1/2" Zinc U Channel
1/2" Zinc U Channel Border
Example of Finished Molding
