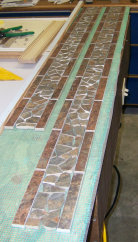
Mosaic Tile Thresholds ready to be installed
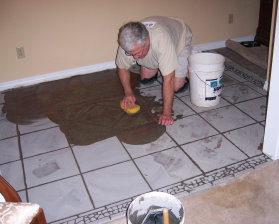
Grouting and Cleaning... the fun part?
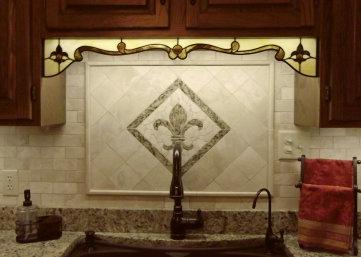
Stained glass header added to tile mosaic
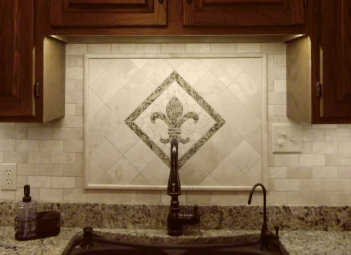
Tile mosaic installed and finished
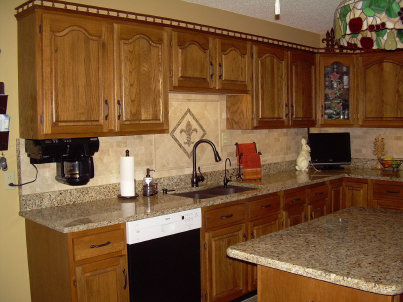
Kitchen after granite counters and new tile backsplash
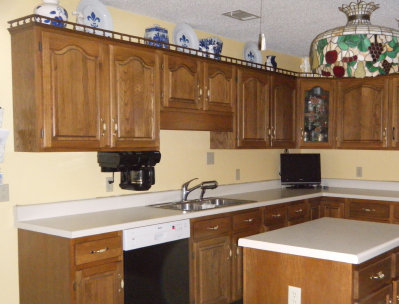
Kitchen before granite counters and tile backsplash
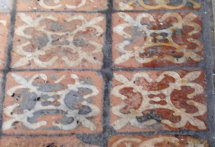
Floor Tile in Salisbury Cathedral
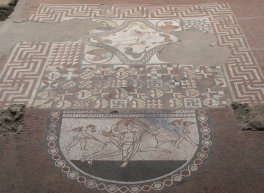
Mosaic Tile Floor in Lullingstone Roman Villa
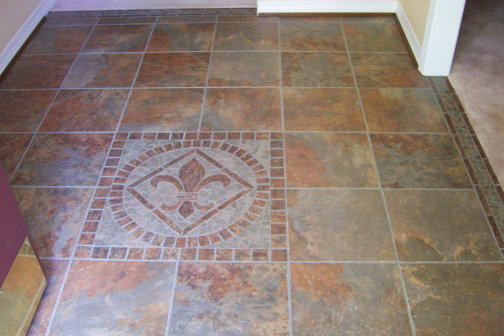
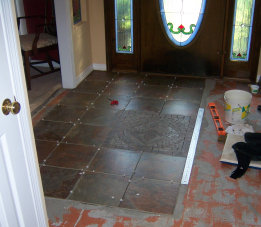
Finished floor with mosaic emblem and mosaic thresholds
Spacing and setting tiles and mosaic units.
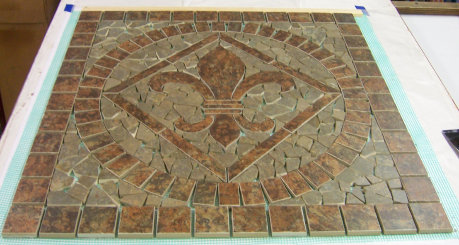
Tile Mosaic .... cut out and ready to be installed.
Since my wife really likes the fleur-di-lis motif and I wanted to do a tile floor for our foyer, I decided I wanted to learn to do a tile mosaic. The first step was to devolop a paper pattern with my complete design. Over the pattern I put wax paper and then a layer of fiberglass mesh that builders use for stucco or drivet installation. The plan was to cut each piece of tile and glue it to the mesh... the wax paper was to keep the tile and mesh from sticking to the pattern. All of the square pieces were cut with a standard diamond blade wet tile saw. The curved fleur-di-lis pieces were cut with the same diamond band saw that I use to cut my stained glass. For those who don't have a band saw, the curved pieces could be cut very carefully with a regular tile saw and grinder. The background pieces were broken pieces fit in randomly by hand. When the whole piece was assembled and glued, it is ready to be put into the floor as one piece. By the way, this is all the same color tile... an imitation slate porcelain tile. The color variation was achieved by cutting the brown pieces from brown sections of the tile and cutting the gray pieces from gray areas of the tile.
The mosaic and thresholds are set into the thinset adhesive as single pieces just as each tile is set in place.
Tile Mosaics
Dean's Stained Glass
Dean's Stained Glass
In 2006, on a trip to England, I saw two things that sparked an interest in building a complex tile mosaic. In Salisbury Cathedral, a section of the original floor tile (about 1200 AD) depicted tile with fleur-di lis emblems. This gave me the idea of doing something in the entry foyer of my house with floor tile. The Salisbury floor tile is pictured to the right.
Tile Mosaic .... cut out and ready to be installed.
Later in the same trip, I visited Lullingstone Roman Villa south of London ( built about 43 AD) and was amazed at the complex mosaic tile floor preserved from this building. The Romans built quite complex tile mosaics and used broken tile as fill in around specific design elements. Having a hand made mosaic floor or wall mural was an indicator of wealth in the Roman world. See photo on the right.
Mosaic Tile Thresholds
After grouting and cleaning, our floor turns out as displayed on the right.
Finished floor with mosaic emblem and mosaic thresholds
Mosaic Tile Floor in Lullingstone Roman Villa
Floor Tile in Salisbury Cathedral
I hope this explanation may help you if you wish to do a tile mosaic project.
Wall Tile Mosaic
After my positive floor tile experience above, I thought I might be able to take the same experience and turn it toward a wall mosaic. My wife encouraged me..... maybe because she wanted granite countertops out of the deal.
To the left is our kitchen with old formica countertops and a painted wall backsplash..... comfortable, but two decades old!
To the right is our same kitchen with new granite counter tops (New venetian gold) and my new tile backsplash and tile mosaic inset over the sink. The background tile is 2" x 4" cut travertine.
To the left is the finished mosaic over the sink. The fleur-di-lis is cut from granite floor tile (New venetion gold) to match the granite counters. The granite tiles were cut with a diamond blade band saw that I use to cut stained glass. Your local granite shop should be able to help cut out a curved design, should you want to do something unique in your project. The diamond mosaic is 12" on each side and has broken pieces of travertine surrounding the fleur-di-lis. It was built as one unit, glued to fiberglass mesh and installed on the wall as one piece. Outside the diamond mosaic are 4" diagonal cut travertine tiles inside a travertine pencil border.
Not being one to leave things alone, months later I decided to add a stained glass header to conceal the LED lights illuminating the sink!
I learned much doing this project, and created something a little unusual. I hope the ideas and concepts presented here may be of help to you if you decide to work on a kitchen tile project. Just like stained glass, there is nothing mystical or magical about tile and tile mosaics.... but, like stained glass, good planning and a healthy dose of patience are required.
Kitchen before granite counters and tile backsplash
Kitchen after granite counters and new tile backsplash
Tile mosaic installed and finished
Stained glass header added to tile mosaic
