Stewart Transom Renovation lit up with LED light strip
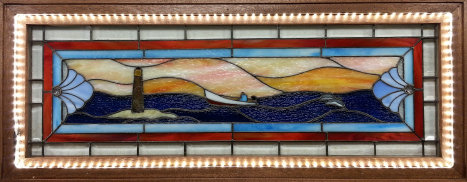
Back view with all of LED strip lit up
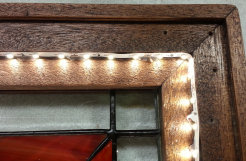
Frame with LED strip lit up
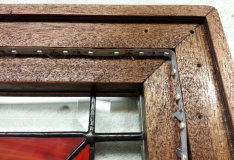
Frame with recessed LED strip
Cutting and fitting the new glass
Center stained glass removed
Removing the center stained glass
Removing the center stained glass
Stewart Transom Renovation
Stewart Transom Renovation outside.
Stewart Transom
Stewart Transom Renovation
Dean's Stained Glass
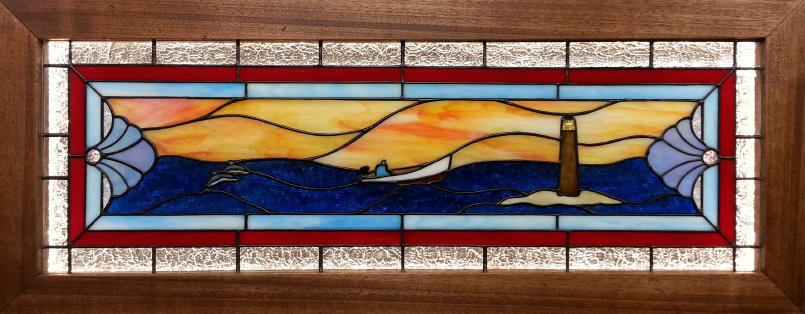
This transom was rebuilt in March of 2014. To the right is our finished product.
Stewart Transom Renovation
Dean's Stained Glass
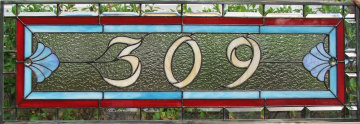
In 2006, I built the above transom for Mr. Stewart's new waterfront home in Gulf Shores, Alabama. Years later, he had some health issues, sold his house and removed his prized front door transom for possible later use. Unfortunately his new home was not numbered 309, so this transom sat wrapped up for several years. In that time, Mr Stewart & I have become great friends, so I resolved to try to make his old transom into something he could still appreciate. He grew up around Mobile Bay, and enjoyed fishing the waters around Sand Island Lighthouse. Being an avid boater, he is now building custom wood boats in his backyard workshop. It just made sense to try to convert his transom to a more nautical theme.
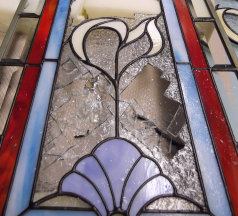
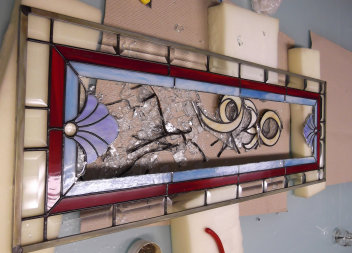
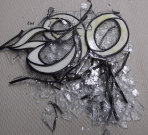
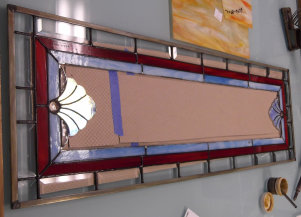


The outer bands of the transom were fine, so the challange was removing the inner glass without destroying the whole transom. The first step was carefully criss cross scoring the inside glass pieces with a glass cutter and tapping them from the back side so that the glass would break into small pieces and fall out.
This is a time consuming process. Each piece has to be removed carefully so as not to damage adjoining pieces. Above is a photo showing much of the glass removed
Above is the transom with all glass removed and ready for new center glass
I then traced the outline of the empty central space, and drew a new design to fit that space. Above is a photo of most of the glass cut out and ready to be foil wrapped.
Above is the transom with the center replaced, soldered and ready to have the solder antiqued.
Anyone need any scrap!
Stewart Transom Renovation outside.
Stewart Transom Renovation
Stewart Transom
Mr Stewart didn't have an ideal exterior window in his Mobile, Alabama home to display this transom. We decided to create an LED lightbox so that the stained glass can be placed on an interior wall. Being a boatbuilder, Mr Stewart provided me with some beautiful mahogany boards that would make a perfect frame. I had to figure a way to mount the LEDs so they provided background lighting inside the frame. I built a heavy mahogany frame and routed a groove in the back of the frame so that i could recess the LED lights out of sight.
However, several months later, the story continued!
Above shows the LED strip recessed into a groove on the back of the frame.
Above shows the the same LED strip lit up
Back view of the frame with entire LED strip lit up. A wood back panel, covered with crinkled aluminum foil, will finish off the frame.
Our finished re-purposed transom in its mahogany framed lightbox is pictured to the right. Light is provided by an LED light strip using only about 10 watts of power. This transom, now a wall hung stained glass, measures about 15 1/2' x 39", contains 101 pieces of glass and was completed in June 2014. It is again on display with Mr Stewart in his home in Mobile, AL.
Stewart Transom Renovation lit up with LED light strip


